Not your Gramma’s creamed rice!

I loved my Gramma Verna’s cooking, she mostly a combination of Pennsylvania Dutch and poor farm family. Whichever it was, I loved most it!  I was a picky eater!!

One of the things she made was creamed rice. I suppose it was similar to rice pudding, just hot.  Because to get me to eat it, she sprinkled brown sugar over my serving.

I watched her make it several times but I honestly do not remember her ingredients, nor the measurements.  So I always made it like I thought she did.  And I have to admit, I think I pretty much nailed it.

That said however, I kicked up the flavor.  I like to add cinnamon, nutmeg and cardamom.  And brown sugar!  That will never change!

Quick cooking rice will not work for this recipe. Trust me…

I cook my rice until tender, add about 1-3/4 cup milk and let that very lightly simmer, stirring often until I get that luscious creamy texture.  You may need to add a little more, or a little less depending on your rice.  Just before I turn the heat off, I add brown sugar, cinnamon, nutmeg and the cardamom,. Stir until blended and it’s ready to serve.

You can serve is as a side or as a main dish along with a veggie or salad.  This isn’t something I have often, it’s more of a comfort food, something that is wonderful on a chilly and cozy night.

I hope you love this as much as I do and it becomes your comfort food too.

Cinnamon and Cardamom Creamed Rice

1 cup rice, cooked until tender per package direction (do not use a quick cook rice)

3/4 cup milk

1/4 tsp cardamon

1/2 tsp cinnamon

pinch of ground nutmeg

1 tsp vanilla

2 T brown sugar


  1. Cook your rice per package directions, using about 1 tsp salt.
  2. Reduce heat to a low to medium low heat for just a light simmer. Add 1/2 cup of the milk and stir often.  Add the remaining ¼ cup if needed to bring rice to a creamy consistency.
  3. Just before turning off the heat, turn to low and add the remaining ingredients. Stir until well blended. Remove from heat and serve.

Breakfast Quesadilla Wraps

Breakfast Quesadilla Wraps

These breakfast quesadillas are so easy, and so versatile.  You can make them any way you want and they only take about 15 seconds in the microwave to heat up.  And better yet, you can eat them on the run.

The flour tortilla I used was the same size as my skillet so when I added my egg, it cooked to the perfect size.

You can use just plain scrambled eggs, or you can add spinach, veggies, smoked salmon, cooked crumbled bacon, anything at all!

After you cook your egg thoroughly, place it on top of the flour tortilla.  Add shredded cheese or anything else you would like.

I cut mine in half but you can leave it whole. Then I wrapped each roll into a piece of parchment paper and popped them in the fridge.  Heat one wrap for 15 seconds, carefully unwrap and enjoy!

Flourless Chocolate Chip Peanut Butter Cookies

These cookies are amazing and only 4 ingredients! They mix up in a matter of minutes and are so delicious they will not last long, cuz they will be devoured quickly.

I love my Gramma and Mom’s old fashioned peanut butter cookies, but these are great if you are trying to eliminate flour and eat a little healthier.

They really are yummy, and I have to admit, go perfectly with a glass of wine.  Or milk, you decide!

The simple ingredients are 3/4 cup brown sugar, I used light.  One cup of peanut butter, I prefer creamy but you can certainly use the peanut butter with nuts. One egg and 1/2 (or a little more) chocolate chips.  I wanted to use the mini chips but I could not find any. You could also omit the chocolate chips and just make them peanut butter, or add peanut butter chips to boost that nutty treat.

Mix the brown sugar, peanut butter and egg, by hand, until well blended.  Add the chocolate chips and stir so that they are evenly distributed.

Roll into balls, I used a small scoop so they were all the same size. Place on parchment paper about 2 inches apart. Flatten with a fork and make the usual cross pattern, or just flatten with the bottom of a glass.

Bake at 375 for about 12-15 minutes but make sure to not over bake.

You are going to love them!

Bite sized yellow squash with marinara sauce and shrimp

I had a hard time trying to decide what to call these little delicious bites of yumminess! So I just called them what they are!

These little delights make a great side dish with pasta or chicken, and are even delicious on their own. And they make a great appetizer too!

I preheated my oven to 350.  While the oven preheated, I prepared the shrimp.  I used deveined and peeled shrimp with the tails removed. Place the shrimp in a bowl and coat with olive oil. Next comes the seasoning, and you can use whatever you like.  I used a little season salt, ground cayenne pepper, salt and pepper, Old Bay Seasoning, a little cumin, smoked paprika, and garlic powder.  Coat the shrimp thoroughly, scatter over a baking sheet in a single layer and bake until cooked through.

While the shrimp are baking, slice the yellow squash in rounds, about ½ to ¾ inches thick.  Place on a plate and drizzle with olive oil, salt and pepper.  Heat up a grill on your stove or just use a fry pan. Grill or cook until JUST tender and remove from the heat.

Place them in a single layer on a baking sheet. Add a spoonful of marinara sauce and top with one or two of the cooked shrimp. Sprinkle with a little shredded mozzarella cheese and back until the cheese melts.

Don’t they just sound delicious!!  Enjoy!


Find me on Facebook, there is a link on my home page or search for Kartwheels in the Kitchen.

Sun-dried Tomato & Rosemary Focaccia

It’s been too long since I have posted any recipes. Much too long. I have been dealing with tummy issues for a little over a year. This has been a long, difficult and challenging year, because I LOVE to eat and cook!

My tummy craves new recipes and my favorite foods, but I just can’t eat a lot of what I used to be able to enjoy. So I am working on finding other foods that my “tummy” can tolerate and will also satisfy my cravings.

One of the things that I can have, is bread. Go figure. But I don’t like to eat a lot of it, so flatbreads, naan, and this focaccia bread is perfect.

This focaccia is also as a snack with a glass a wine when having friends over.

And it is so easy! I started with the making the dough, mixing by hand. Then either hand kneading for a bit OR, toss it in the stand mixer with a dough hook for about 5 minutes. Let it rise for 1 to 1-1/2 hours, then spread out on a baking sheet and let rise for another 30 minutes. After that, you “dimple” it, add the rosemary and tomatoes, olive oil and salt and bake it.

The fun thing is, you can change the toppings, or leave it plain if that’s what you prefer. But I love, love, love coming up with different toppings. Olives, capers, mushrooms, thinly sliced bell peppers, cheese, the list goes on!

This makes about a 10 by 13 inch focaccia, so if you are not going to eat it within a day or two, I would suggest using just half the dough. The unbaked dough should be good for about 2 days in the fridge.

Here’s the recipe:

SUN-DRIED TOMATO AND ROSEMARY FOCACCIA

1/4 oz packet of active dry yeast (2-1/4 tsp)

1 tsp granulated sugar

2-1/2 cup plus 1 T all purpose flour

2 tsp salt

1 T olive oil plus more for drizzling

1/4 c chopped sun dried tomatoes in oil (must be packed in oil)

2 tsp chopped rosemary

flaky sea salt for sprinkling

  1. Warm a small bowl with hot water, let sit for about 3 minutes, then pour out the water.
  2. Add to the warm bowl the sugar, 1 T flour yeast and 1/4 cup warm water. Let stand for 5 minutes, it should be creamy and slightly bubbly when done.
  3. While the yeast mixtures sits, add to a large bowl the remaining flour and salt (NOT the flaky salt). Make a well (hole) in the center of the flour. Add the yeast mixture, olive oil, and 3/4 cup warm water. Stir with a wooden spoon. Dough will be sticky. Mix until the dough pulls away from the sides of the bowl.
  4. Transfer dough to a floured surface and knead for 8 minutes. OR place dough in the bowl of a stand mixer with a dough hook and knead for 5 minutes.
  5. Place dough in a large bowl coated with olive oil. Cover with plastic wrap and a dish towel, place in a warm spot to rise for about 1 to 1-1/2 hours or until doubled in size.
  6. Prepare a baking sheet, line with parchment paper. spray with a non-stick spray.
  7. Stretch dough out onto the baking sheet to about a 10-13 inch rectangle but do not stretch it too thin. If your dough doesn’t stretch out quite that large, that is fine. Let the dough sit for 30 minutes to rise again.
  8. After the 30 minutes, dimple the dough with your fingertips. Top with the chopped tomatoes and rosemary. sprinkle with the salt and then drizzle with the olive oil.
  9. Bake at 350
  10. When you bring it out of the oven, drizzle with more olive oil, cut and serve while still warm.


Fried Sage and Cheese Ravioli

I don’t know about you all but I am thankful for some cooler weather. Well, actually cold temps are making me happy right now.  I needed a break from cutting my grass!!

I love my yard, my flower and a veggie gardens and of course my patio.  But, keeping it going all summer is hard work.  And usually by September, I am tired and fed up with the humid and hot weather.  Not to mention the bugs!

All my garden beds are sleeping and I think my lawn is finally sleeping!  My back and hurting shoulder are thankful for the rest.  But in all honesty, after Christmas I’ll start planning the garden beds for the spring.

Any new flowers or veggies I want to try will be on a list and I’ll start to draw out designs too. But, let’s get to this recipe! 

The one thing I did have going, up to Thanksgiving anyway, was my pots of herbs by the back door.  They are done now but up to the Thanksgiving holiday I was trying to create some new recipes to use up the herbs.

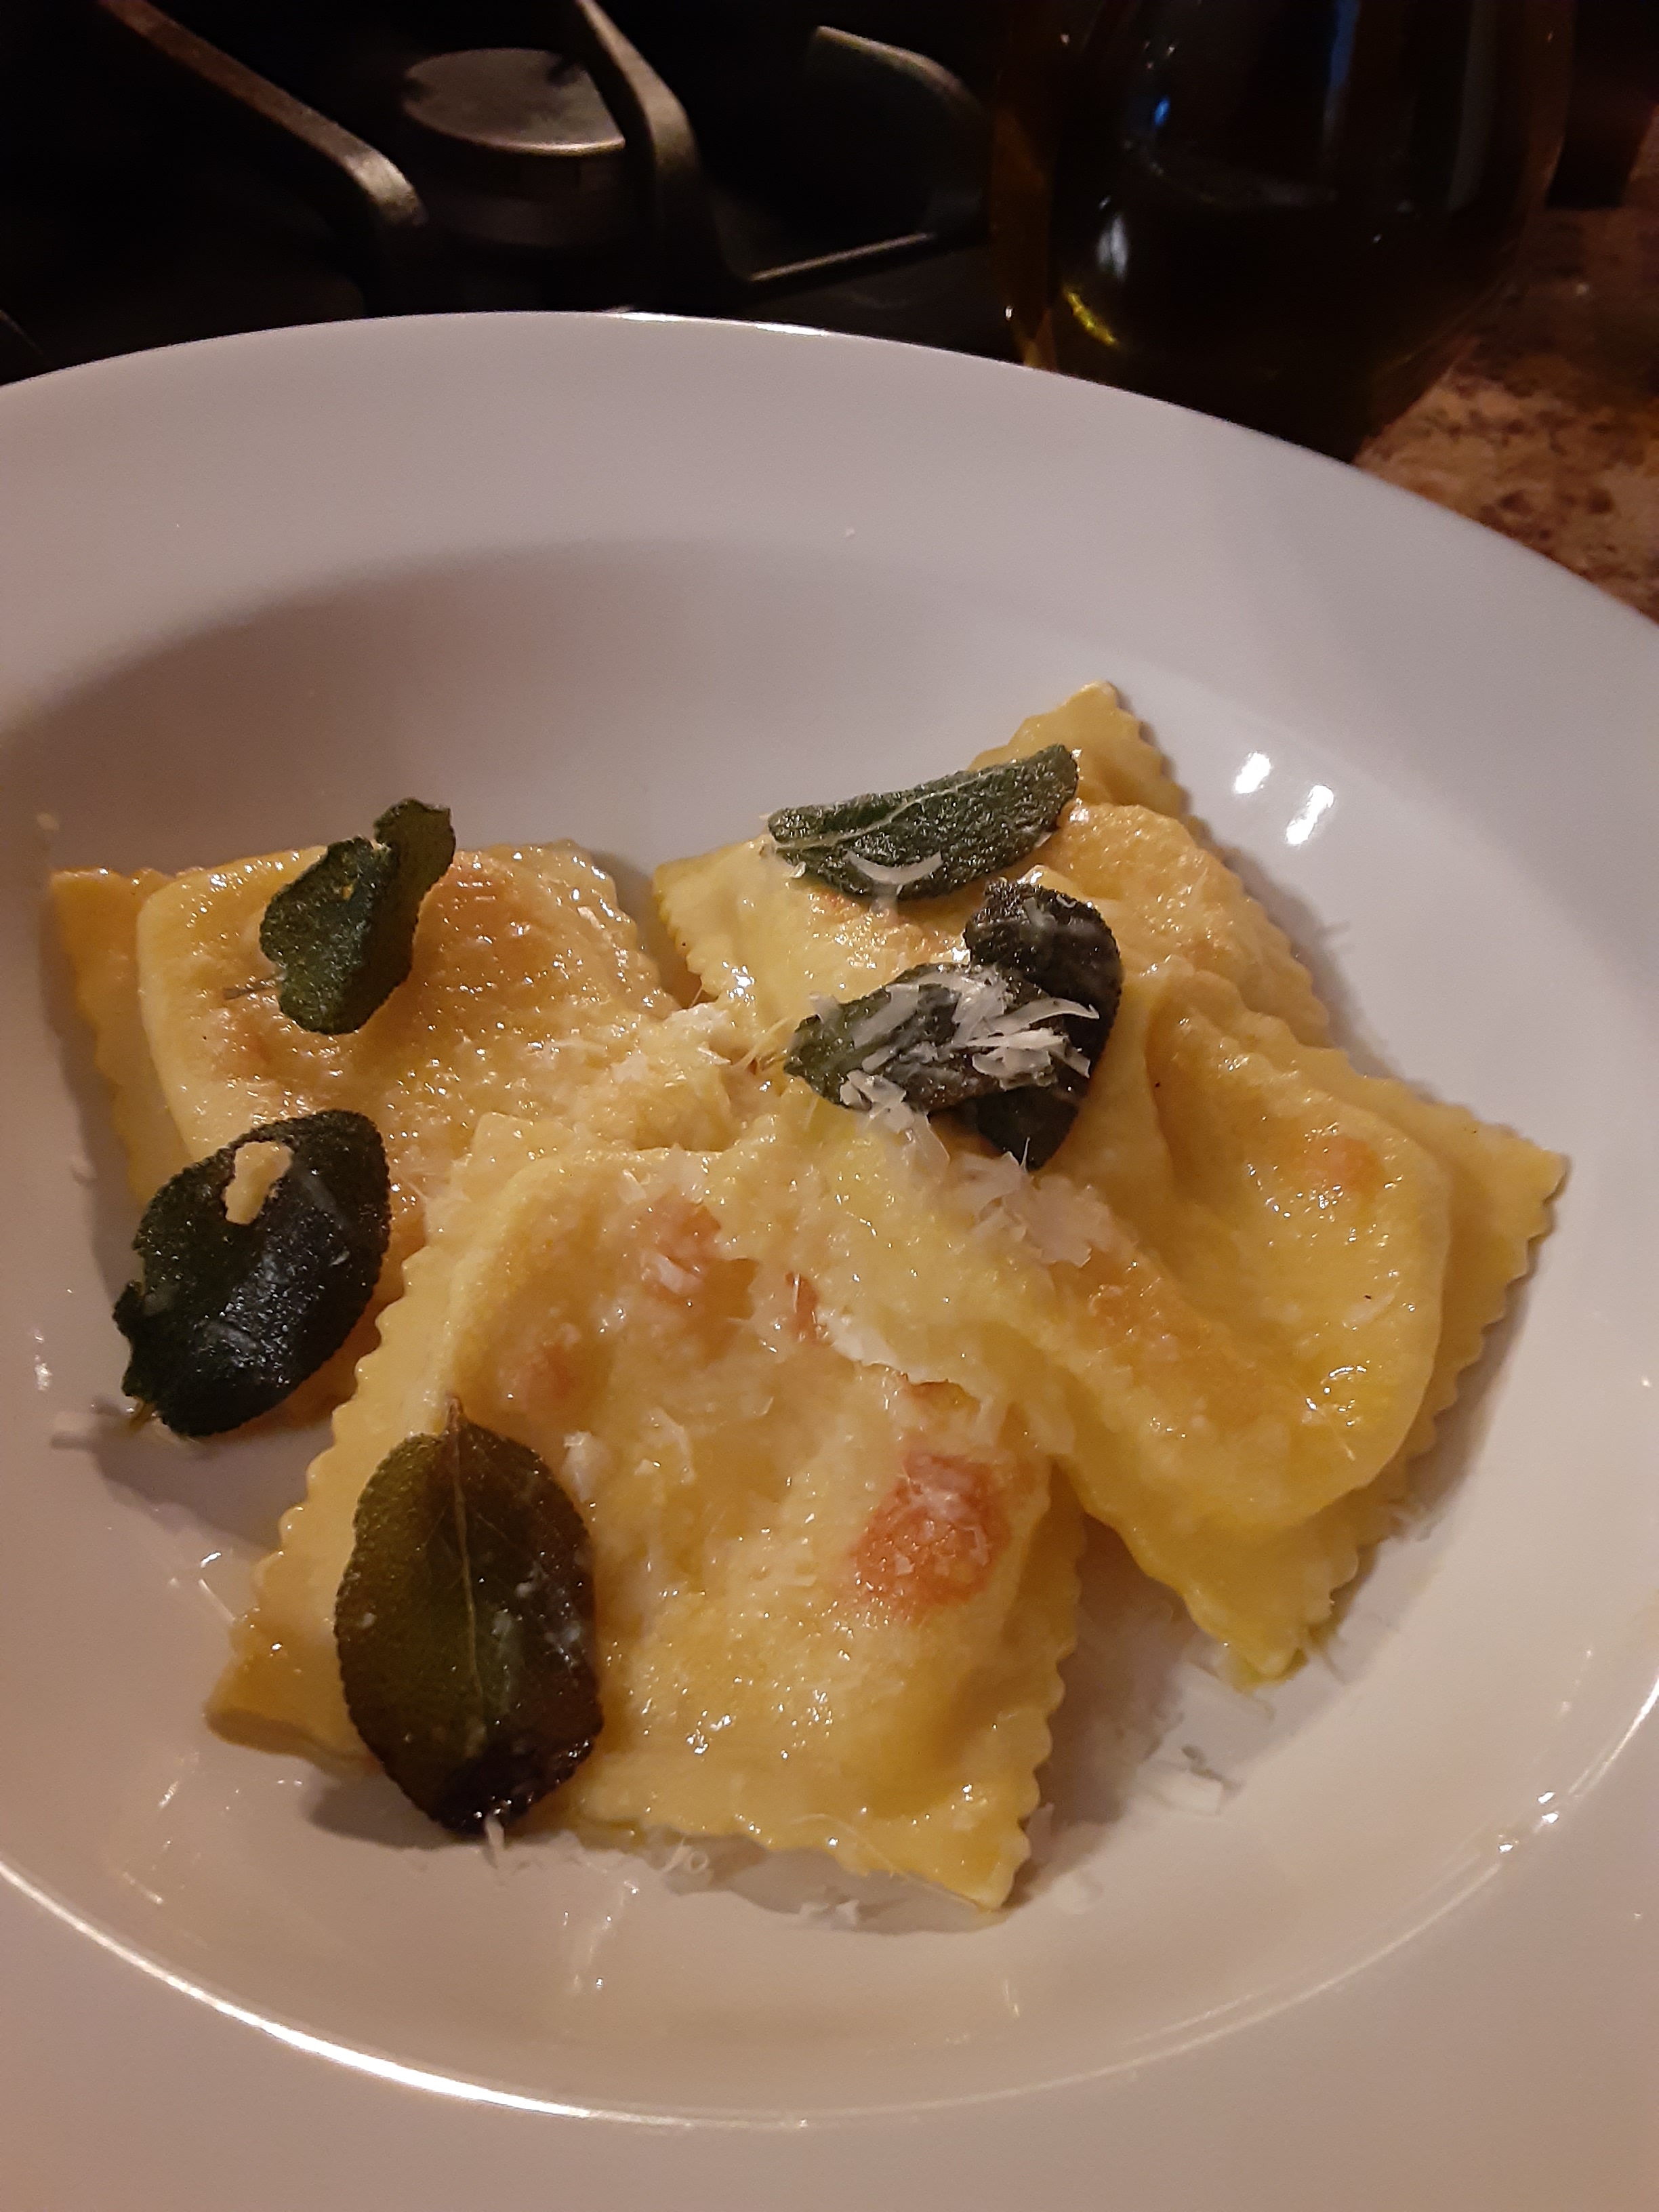
And this fried sage and cheese ravioli did NOT disappoint!  It comes together quick and goes perfect with a small side salad and a little rosemary parmesan flatbread (I’ll post that next).

The first thing I did was get a little pot of water to boil, you do still have to cook the frozen ravioli.  If you are making fresh, I would still do a quick simmer with them.  The uncooked dough would not be very tasty I’m sure.

While the water came to boil I started to melt some butter along with a little olive oil. When it was hot, I tossed in some clean and DRY sage leaves.  I kept the heat low enough so it didn’t burn while the ravioli finished cooking.

As soon as the ravioli was done, I transferred each ravioli to some paper towels to dry and then carefully added them to the hot butter and oil.  Be careful, it can still spit a little.  Do not over cook, the dough can get a little tough. 

Then I just gently fried the ravioli until a light golden brown. I did sprinkle with some salt and pepper. Transfer to a plate, sprinkle with fresh grated parmesan cheese and enjoy.  The entire process only took about 15 minutes.

A glass a Pinot Noir went well with this dish!

Enjoy!!

FYI, be sure to follow me on Facebook, I have a lot almost daily ramblings and posts. I have hardly posted anything here lately because I have been dealing with a lot of tummy issues for almost 2 years now, and I get sick on a lot. So cooking is few and far between because I am still trying to find what works for me. Although sometimes that changes. It’s been frustrating to say the least. Anyway, see you over on Facebook under Kartwheels in the Kitchen.

“Healthy” Fudgy Brownies!

Yea that’s right, “healthy” and fudgy brownies! And everyone that takes a bite into one agrees that they are delish. When I tell them the ingredients, I am not sure they actually believe me.

These delicious brownies are made with sweet potatoes, dates, applesauce, and nut butter.

A few steps but so worth it when you pop that first brownie in your mouth. But let me tell you how I came upon this recipe.

I attended a healthier living seminar at a local wellness center; this brownie was served and the recipe handed out.  I have no idea where it came from but I can tell ya this, the person that created this recipe is a goddess!!!

I do add a little more chocolate chips and a little less nut butter. Next time I make them I may try just a spoonful of the nut butter and maybe some mashed bananas. I don’t like to mess with a good thing but I love playing with recipes and changing up the ingredients.

My oven has not been working properly for awhile. I am putting off the inevitable, and will eventually need to replace the “motherboard”?? I think… the darn thing started giving me problems when it was just under 5 yrs old. Appliances just are not made like they used to be. Anyway….

Let’s get to it!

Sweet Potato Brownies

1 cup chopped, pitted dates

2/3 cup cooked sweet potato, mashed

¾ cup nut butter

2 eggs

1/3 cup unsweetened cocoa powder

¼ cup unsweetened applesauce

½ tsp baking soda

2/3 cup dark chocolate chips

  1.  Preheat oven to 375 degrees, prepare a 8×8 or 9a9 inch backing pan (sprayed with non-stick spray).
  2. Put the applesauce, dates, sweet potato, and nut butter in a food processor (or high powered blender), process until smooth.
  3. Add the eggs, blend until smooth.
  4. Sift in the cocoa powder and baking soda, pulse until combined.
  5. Stir in the chocolate chips.
  6. Spoon into the greased pan and back for 15 to 20 minutes.  Do not overbake.

ENJOY!!

Pumpkin Coffee Cake

If you’re looking for a coffee cake recipe that’s just a bit different, this is the recipe you need.  It has the usual glorious crumble, cinnamon and other warm spices, and lots of pumpkin.  It’s really delicious when it’s just a bit warm too. And it’s perfect for the holidays, which by now, are long gone.

I started this recipe back in October, made it again in December but I’m just now getting around to posting it.  Life has been crazy hasn’t it?  I set some things aside like my hobbies and recipe creating, and tried to concentrate more on prayer, yoga, meditation and reading.  My day job workload has been a bit overwhelming too, and along with COVID life these days, I just needed to concentrate more on “me”. 

And, I have been dealing with tummy issues again so I am trying to figure out what I can eat and sadly, the foods my system no longer tolerates.  Sad to say it is a lot of healthy foods, like berries with little seeds, avocados (crying here!), certain nuts….

Anyway, this cake went well with my tummy in more ways than one!  It’s so satisfying and tasty, warm and cozy.

First thing I started was the streusel topping.  In a medium bowl add brown sugar, flour, cinnamon and softened butter.  Then cut the butter into the sugar/flour mixture until you have some nice crumbles.  Set that aside and grease an 8 inch square baking dish, I use glass for  my baking.

Next comes the cake batter.  Put all the dry ingredients into a large bowl.  I used my stand mixer with the paddle attachment.  I made sure the dry ingredients were well blended.  In a smaller bowl place all of your wet ingredients and blend well.

Add the wet ingredients to the dry ingredients, blend ell with the paddle attachment but don’t over mix.  Remove the bowl from the stand and stir by hand to make sure everything is mixed in.

Pour half the batter in the baking dish, place half of the streusel over the batter. Carefully spoon the remaining batter over the streusel, spreading the batter to sides of the baking dish.  Top with the remaining streusel and bake.  Easy!

The hardest part is waiting for the cake to cool.  Once it is cool enough to cut but still a little warm…dig in!

This would be great with a maple glaze or apple cider glaze.

Here’s the recipe:

Pumpkin Coffee Cake

Streusel Topping:

½ cup brown sugar

¼ cup flour

1 tsp cinnamon

4 T butter, cubed

Cake:

2 cups flour

1 tsp baking powder

½ tsp baking soda

½ tsp salt

1 tsp pumpkin pie spice

1/8 tsp each of ground cloves and allspice

½ cup brown sugar

½ cup sugar

2 eggs

1 cup pumpkin puree (NOT pumpkin pie filling)

½ cup vegetable oil

  1. Preheat oven to 350 degrees and place rack in the center of the oven.  Grease a 8inch square baking dish.
  2. In the bowl of a standing mix with a paddle attachment, add all the dry ingredients and stir until blended.
  3. In a separate bowl add the wet ingredients and blend well.
  4. Add the wet ingredients to the dry ingredients and blend gently until just combined.  Remove the bowl from the stand mixer and gently stir by hand to make sure all ingredients are well combined.  Do not over mix.
  5. Pour half the batter into the prepared baking dish and top with half the streusel.
  6. Spoon the remaining batter over the streusel, one area at a time, and then carefully smooth over.  Top with the remaining streusel.
  7. Bake for 30-40 minutes or until toothpick or cake tester comes out clean.

Creamy Parmesan and Black Pepper Salad Dressing

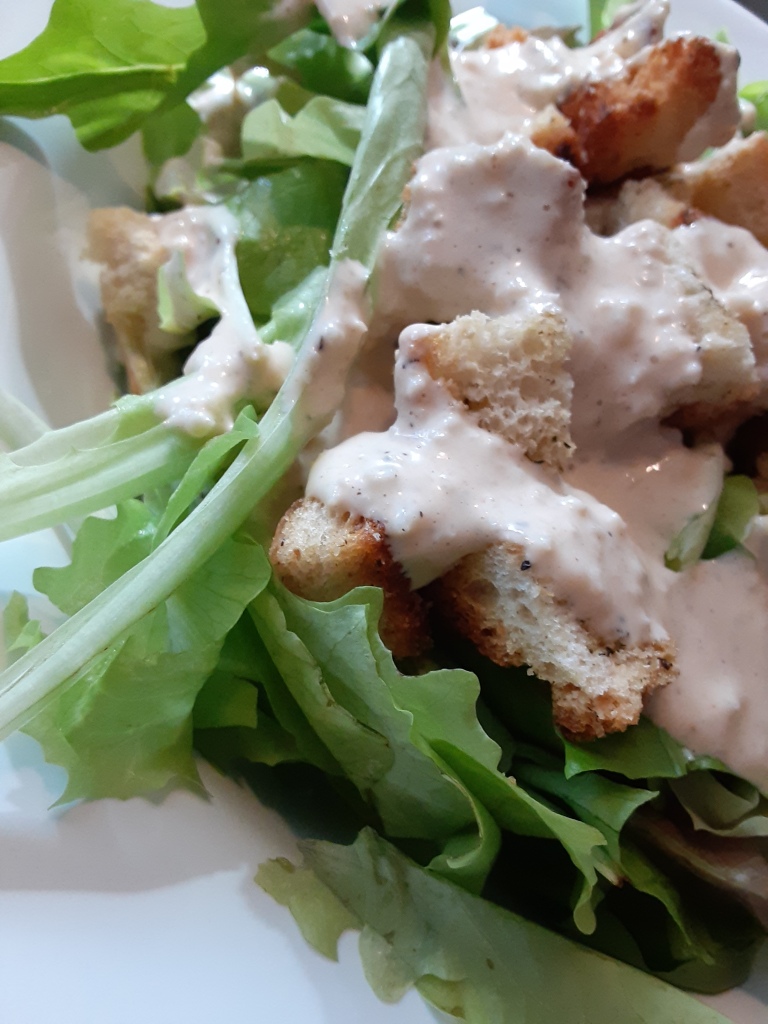
This dressing is quickly becoming a favorite of mine.  The creaminess of the parmesan, the pepper, and the yummy hot sauce I added, YUM, it’s so good!!

And I was able to use with the last of my lettuce from my garden.  I planted a variety of lettuce seeds, then it got pretty cold and it seemed to stop growing.  Then we were blessed with some 50-60 degree days and nights and the lettuce just took off!  I was able to harvest two large bags of lettuce.

I had a few tomatoes too, and I made homemade croutons too (recipe is here).  So this salad and dressing is just perfect right now.

So let’s get to it… start with a good brand of mayo that you love.  The parmesan cheese needs to be finely grated, and again, you want the good stuff.  NOT the jarred stuff in the pasta aisle, I am pretty sure there is no cheese in the green jar anyway!  Fresh lemon just is best too.

Yes, in a pinch you could use the jarred cheese and bottled lemon juice, but fresh is best.

I put mayo, cheese, Worcestershire sauce, Dijon mustard, salt and pepper in a bowl and stirred well. Then I added the lemon juice, about 1 Tablespoon at a time until I was happy with the taste.  Same with the hot sauce, about a teaspoon at time.

I think this might be good drizzled over chicken too!

Creamy Parmesan and Black Pepper Salad Dressing

¾ cup mayonnaise

½ cup finely grated parmesan cheese

¼ to ½ cup fresh lemon juice, add 1 T at a time

4 tsp Dijon mustard

4-5 teaspoons Worcestershire sauce

Hot sauce, add to your preference, 1 tsp at a time

Salt and lots of freshly ground pepper

  1. Add mayo, parm cheese, mustard, Worcestershire sauce, salt and pepper to a bowl and stir to combine.
  2. Start adding lemon juice, 1 T at a time, to your liking.
  3. Add hot sauce to your liking, 1 tsp at a time.
  4. Store in a tightly sealed jar in the fridge for up to 2 weeks.

Apple Galette with a Gingersnap Crumb Topping

How is everyone enjoying this gorgeous fall weather?  It’s been quite lovely here in south central PA.  And I am really enjoying the fall foods, apple desserts, pumpkin everything, and lots of warm spices like cinnamon, cloves and allspice.

Not only do I love everything pumpkin in the autumn months, I also love apple and cinnamon.  Apple pie, apple crisp, apple cider doughnuts and apple cider drinks, yum!

My first try at apple cider doughnuts was in a visit to my family in Mystic, CT.  Then took me to this little apple mill, they left you in the building where they pressed the apples to make the cider.  All the old fashioned way, it was awesome.

My family told me they had they best apple cider, and I totally agree, it was!  And as I mentioned, it was  the first time I had apple cider doughnuts.  That was years ago but now they seem to be everywhere.  Which I am VERY happy about!

Anyway, back to the galette.  I suppose this is also a fancy word for rustic apple pie, either way I loved this tasty dessert!

I used a store bought pie crust that I had in the freezer, I just left that come to room temp before using. I like to make my own pie crust but I had this in the freezer and wanted to get it used up before it became freezer burnt.

I cut 4 medium to large apples, and chopped them into bite size pieces.  You can use any apples you want or have on hand but you will need to adjust the sugar according to the sweetness of the apples you are using.

I placed those apple chunks in a bowl and added sugar and cinnamon.  I used about 1/3 cup white granulated sugar and 2 T of light brown sugar, along with 1 tsp cinnamon.  I coated the apples well and left them sit in the bowl while I made the crumb topping.

I placed about 6-7 broken gingersnaps in a plastic bag and smashed them to nice crumbs but leaving a few large chunks too. I added them to a separate bowl.  To the gingersnaps I added a heaping  ¼ c of old  fashioned oats, ½ tsp cinnamon, 2 T brown sugar,  2 or 3 T flour and 3 T of cold butter cut into small cubes.

Then I used my trusty pastry cutter to cut the topping into nice crumbs. 

Next I placed the pie crust dough on a lined cookie sheet.  I used a baking mat but you can also use parchment paper. I placed the apple chunks in the middle of the crust and left them spread to about 2 inches from the edge of the dough, then I folded up the edges and pressed lightly together.  I piled on the crumb topping, letting it fall over onto the crust.

I popped that in the oven at 350 degrees for about 35 to 45 minutes, or until golden and the apples are tender.  You know your oven!

This is so delicious served warm, with or without ice cream!  Ice cream would be better in my personal opinion.

Enjoy!

Apple Galette with Gingersnap Crumb Topping

1 pie crust

4 medium to large apples, peeled, sliced and cut into chunks

1/3 cup white granulated sugar

2 T light brown sugar

1 tsp cinnamon

For the topping:

6-7 gingersnaps

¼ c old fashioned oats

½ tsp cinnamon

2 T brown sugar

2-3 T flour

3 T cold butter, cut into small cubes

Preheat oven to 350 degrees

  1. Place apple chunks in a bowl, add remaining ingredients and toss gently. Set aside,
  2. In a separate bowl add all the ingredients for the topping and using a pastry cutter or 2 knives, cut in the butter until it becomes crumbly.
  3. Place pie crust on a lined cookie sheet (parchment paper or a baking mat) add the apples in the center and gently spread out to about 2 inches from the edge.  Fold up the remaining crust to hold apples in and gently press.
  4. Top with the crumb topping to cover all the apples and letting some fall onto the crust.
  5. Bake for 35-45 minutes at 350 until golden and apples are tender.