Mimi’s Garden – Fall Gardening Chores, Part 2

I’m working on my vegetable gardens to prepare for fall. It can be a messy one too! And I’ll miss walking through my yard to my veggie gardens and plucking yummy food for my tummy.

This year I neglected some of my tomato plants and did not keep them as groomed as I like. They grew like weeds too, I am still getting tomatoes and it’s almost the end of September. Night temps have been in the 40-50’s already. So I had to get busy!


Since each tomato plant was more a bush, it took me a little longer this year to give them their fall haircut. LOL I start by cutting back the smaller branches, and finding the top if each stem to cut back. Any new flowers and smaller branches need to be removed so the plant can concentrate on growing the fruit that is already on the branch, not producing new growth. That is why the top of the branch needs to be cut off too; it would continue to grow, it’s a vine after all. Again, this will stunt the growth of the plant so it can focus on the existing fruit.

So any branches without tomatoes I removed and the others all were trimmed. I also removed any tomatoes that looked in rough shape.


Next up, the pepper plants. I totally removed one plant, it had completely done its job and had no more blooms.   I still have 3 more pepper plants, thankfully they still have peppers growing. I didn’t have much luck with these plants, I was hoping for a large supply so I could jar roasted red peppers. Maybe I’ll have better luck next year.

For my fall garden I planted 2 types of lettuce seeds, spinach, and radishes. I’ve never planted them this late so I am not sure how things will go, but they do well in the cooler temps in the spring so hopefully I will have the same good luck in the cooler autumn temps!


My herb garden consists of 3 large pots. Last year 2 of my thyme plants and 2 rosemary plants survived the winter and came back in the spring. The rosemary didn’t grow very well for me this year though. All that sage, I started making sage bundles to burn, and I added some summer flowers in the middle of the bundles. Cannot wait to try them!

But for all of the herbs, I have been drying them for use over the winter, pasts are HERE and HERE.

I also grow mint in pots, but I have already tended to them. This was the second summer for the plants and they barely came back so I emptied the pots and will start fresh next spring. I prefer growing the mint in pots because the mint plant is so invasive and will take over the garden bed. Unfortunately, growing it in pots only produces 2 or 3 years of mint and then it dies off. The pots become totally root bound.

After all this work is done, I get to enjoy a winter break and plan next years gardens. Will I set up any new raised beds??? Maybe… But maybe not, I can barely keep up with what I have now! I love playing in the dirt though, and growing flowers and food. It is so rewarding and a blessing from God to be able to do so.

Happy Autumn friends!

Mimi’s Garden – Fall Gardening Chores, Part 1

Fall is my absolute favorite season. I love the colors, the fragrances, the cooler weather, football, everything apples and pumpkins!

I love spring too, when everything is sprouting and coming to life; poking through the dirt like little praying hands being raised up to the heavens.

But for the autumn months, everything beautiful is preparing for a long nap. To rejuvenate for another display of beautiful blooms next spring.

And for this to happen, there is a lot of work! Plants need to be cut back, or divided, and some just snipping off stems and keeping them rooted in water. The plants that I want to snip and place in water, will sit on a windowsill until early spring and then potted. Sometimes I’m lucky and they survive, and sometimes they do not. But nonetheless, I can still enjoy them for the winter months ahead.


Last year I put all of my potted geraniums and my hibiscus plant in my basement. I cut them back, placed them in the basement still in their pots and they did great! Around late March early April I started to lightly water them, then I brought them up from the basement and as soon as the days were warm enough, I put them outside.

Unfortunately, 2 of them started to grow but then died. The rest survived and have been beautiful all summer. A friend of mine told me that her Mother used to dig them up and hang them upside down by the root ball in the basement. Might have to give that a try this year, some of my pots are too big and heavy for me to try to move.


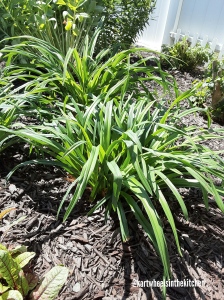
I’ve already cut back a few plants. We had a very hot, dry spell for a few weeks and it took its toll on the red veined dock and day lilies. The flowers of the day lilies were done blooming but the beautiful leaves became dry and then died so they got a haircut! New leaves have since sprouted new growth though. And the red veined dock is starting to come back too.

All of the cone flowers I’ll try to leave alone, the goldfinches LOVE sitting on them and nibbling at the seed.


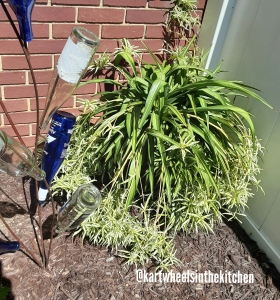
The potted spider plants I will not bring back inside. I’ll trim off all the babies and root as many as I can but the momma plants are HUGE and in large pots that I have no place in the house. I try to find homes for them but my friends are in the same situation, no room. This is where a large gorgeous greenhouse in my yard would be great to have!

This is my first year for a Eucalyptus plant, I love cutting the stems and drying them to hang in the shower. This plant is due for a trim and then I’ll bring the pot inside. Hopefully it will do well as a potted plant inside for the winter months.

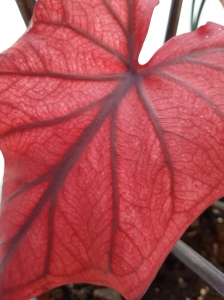
The purple plant on the left, I think, is a variety of a wandering “dude” but I no longer have the ID card. That entire pot is all from cuttings from last year. The coleus on the right, I’ll take cuttings from that and hopefully be able to pot it next spring.

My beautiful Limelight Hydrangeas, these are my favorite. And by March and I am impatiently watching them, waiting for the buds to pop on the branches. I try to dry lots of bouquets and then share them with friends. I also like to keep dried stems as well, using them for arrangements or wreaths. I like to get a bucket of water, and add some dish soap, then as I cut the stems from the plant, I dip the blooms in the water to kill any unwanted spiders or other bugs that I don’t want inside my house. For the most part this does work but on occasion I do find a survivor!

Another gardening chore is to finish cleaning my fence. I started in the spring and have about ¾ of it done but the heat got to me and I put off the remaining panels for cooler weather. I scrub it by hand using a solution of vinegar and dish soap and it works amazingly well!

I also like to clean out my shed, it’s FILTHY right now. Tons of grass clippings, potting soil, and spider webs. It needs to be reorganized too. And, go ahead and laugh but… I like to give my trash can a good cleaning too. That usually just involves some cleaner being poured inside and then powerwashed.

This year I have lots of spring bulbs to plant too. I’ve been in this house for 5 years now and the only spring bulbs I planted have been the Easter hyacinths my kids gave me.

I have a bunch of dahlias too, those bulbs should be dug up and put in the basement but I don’t, come back fine every year. They make beautiful cut flowers all summer, I’ll miss them!

  This is just one of the five butterfly bushes I have.
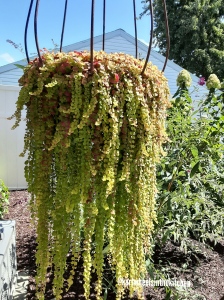
My butterfly bushes I try to keep going well into October if possible. We will still have some butterflies, especially the traveling Monarchs. So I keep them going as long as I can. Then they get cut back to ground level. I’ll those beautiful blooms too.


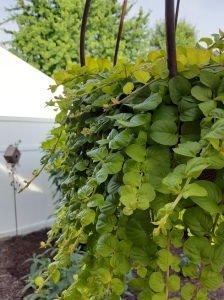
This purple plant, cannot find the ID card, I will take cutting of it as well and hope for the best for next spring.  The hanging plant is a creeping jenny, it comes back each year!  This is the third year in that planter.  And I was able to snag 2 sections of it to make 2 new hanging planters this year.

What plans for you have for your flower beds? Get out there in play in the dirt!

Jarring Tomato Pasta Sauce

I started doing something that I have not done since my kids were wee, little youngsters!  Jarring, or canning, my garden produce.

So far, I have only done tomatoes, which is new to me.  Years ago, I canned peaches, applesauce, green beans, beets and pickles.  I can no longer eat peaches, and I make my own applesauce as needed so I won’t be canning those.  I rarely use beets anymore and I do not eat pickles.

If I can get my hands on green beans at the market, I will jar those.  And I was hoping to jar roasted red peppers but WOW, jars are hard to find!!

I’d also like to try making salsa. Who is buying all these jars??  Please save some for me? Pretty please??

Anyway, back to the tomatoes. I planted a variety of tomatoes this year. I did not care for the heirloom variety, I used a few for BLT’s and the rest I used in the sauce. But for some reason, they seem to rot before they are ripe, not all of them but a majority of them.

I planted a roma plant to use for salsa but I also used them for sauce, as well as some other recipes for dinner.

My grape tomato plant went WILD!!! I just cut back some of the branches because it was taking over all the other plants. Love using them in salads, or as a topper on my flatbread and naan bread recipes. And I love just snacking on them as I pass through the kitchen.

Unfortunately, all of the tomatoes only ripen a few at a time. I have 6 plants, or had. One plant only produced 3 tomatoes and it was done so that one is gone now. The other that I am done with is the heirloom.

So, a few weeks ago I finally found some jars and began the process. I also bought a Ball recipe book since I wanted to try new things this year.

I started with blanching the tomatoes to help with the peeling process. And silly me, I had to take a picture of my processed grape drink (wink wink) while I processed tomatoes.

So, I tossed them in lightly simmering water for just a few minutes and them scooped them out onto a cookie sheet to cool. As soon as they were cool enough to handle I started peeling the skin off and scooped out some of the seeds. And the rest went into the pot.

Then I washed the jars in the dishwasher while I started the sauce.

I added a little olive oil, onion, salt, pepper, garlic powder and onion powder. My kitchen smelled soooooo good!! I left that simmer for a little bit and then used my hand held blender and pureed the entire pot.

When the jars were clean, I removed one at a time and added some lemon juice to the jar per the recipe in the Ball book. Next I ladled in the sauce and put the top on.

The sad thing is that I only ended up with 2 full jars and a half a jar so I froze that. When both jars were done I added them to the boiling water bath and followed the recipe directions.

That was a lot of work for so little sauce but I am looking forward to using it this winter. I do still have tomatoes coming in so I may get a few more jars of sauce. I would love to use smaller jars but I just cannot find them so I might not get to make my salsa and roasted red peppers either.

What foods do you jar?

Drying Rosemary

Rosemary is such a lovely and fragrant herb to cook with. I use chopped rosemary in candles and I love diffusing rosemary essential oil too.

Drying rosemary is so easy, just like the other herbs that I posted about here and here.  Using fresh is much better but buying fresh herbs through the winter can be a little pricey. I only reserve buying fresh herbs at the market for special dinners and occasions through the winter months.

All you need is paper plates, paper towels and a jar that seals tightly.

I like to cut the rosemary that I want to dry and then rinse it off. No bugs or dirt allowed! Then I lay it on a hand towel to dry. You cannot put wet rosemary in the microwave to dry it, it will steam and not work. I do this in the early morning hour and then in the evening I dry the herb.

After all moisture is gone, I strip the rosemary off the stems first and spread it around a paper plate, being careful not to overcrowd. Then I cover with paper towels and nuke it for about 40 seconds 2 times. I like doing the intervals of nuking vs for a minute or longer. I just want to make sure it doesn’t burn.

After a few minutes, when it is cool, I crumble and add to a jar. Done! And ready for cooking over the winter months.

Vegetable Gardening

Once upon a time, a long time ago, I tried vegetable gardening. My tomatoes turned out great but the carrots, not so much. They looked like pencils. I cannot even remember what else I tried to grow but I did not have a clue what I was doing.

Fast forward to this year, this is my second year of veggie gardening since moving into this house and it “almost” didn’t start out well. Let me back up to last summer though.

I bought a raised bed, a cedar garden box. Assembled it myself, filled it with garden soil and then filled it with tomato and pepper plants, and a few onions.

My plants were huge and were producing tomatoes and peppers. Then a bad storm blew through town and tore my plants up. I managed to save about half of each plant. I was so blasted mad but there was nothing I could do.

Everything was continuing to grow quite nicely but then the next garden drama arrived. Bottom rot hit my tomatoes. AGH!  A sweet volunteer at work told me he had a spray he could give me, a spray he mixed. Just spray all the veggies I had, that was my instruction. He said it won’t hurt anything.

Well, it killed EVERYTHING. Even my new flowers that were near the veggies that caught some mist of the spray.  I was devastated. I worked so hard to get this garden going and now it was gone. Completely dead.

This year I bought another raised bed garden box and knew that I would not be accepting any homemade spray or solutions. I am however, grinding up egg shells and using coffee grounds in the garden soil. I did my research and have read that these provide nutrients for the plants. Fingers and toes are crossed…


Using eggshells is easy.  Collect your shells, wash them off and let them dry completely.  Then using a coffee grinder or food processor and go to work.  Store them in an airtight container.  Add them to your garden soil, and work them down into the soil.

So far, everything is fine. But again, it didn’t start that way. We had an early spring this year with amazing warm temps in April so I anxiously planted my veggies. I looked at the forecast online and listened to the weather guys on TV (I know, I know LOL) and I truly thought it was safe.

And then winter returned, with a vengeance. I swear I heard Old Man Winter laughing at me and telling Mother Nature to hold his beer. And she graciously helped him out.

I covered my plants and prayed. Old Man Winter sent cold temps and horrible winds that shredded the heavy plastic I used to protect my plants. I kept going outside and readjusting everything but when the plastic was beyond usefulness, I gave up. I thought I must be nuts to put that much time, money and energy into gardening when clearly I didn’t have a clue what I was doing.

So, I left the plants alone knowing I was not going to plant anything for a few more weeks. I did go and buy 2 more tomato plants and a few more pepper plants. And the next thing I knew, the plants that I gave up on, the plants that I swear had died, sprang to life.

I also wanted to try broccoli this year. It was a whim. And I did not research. The plants got huge! I bought 4 baby plants, and I ended up giving 2 to my niece. The battle I have with these are the cute little white cabbage butterflies lay eggs on them, and then they eat the plant when they hatch from their eggs.

Thankfully, the cardinals know the little boogers are there and are helping me to get rid of them. I love my little red helpers, and I really love when they sing their little songs while they visit.


I love spending time outside, connect with nature and tending to my gardens, but this heat. WOW. I usually have to cut my grass every 3 to 4 days, and I section off my yard so I can do a little each day. So I haven’t had much time to post any food recipes but I have been having tummy problems so I’m not really cooking.

I’m sure you’ve heard of the BRAT diet. If you haven’t; it’s just bananas, rice, applesauce and toast. I’m slowly introducing some foods back into my system, sort of a test to see what I can and can’t eat. Basically I’m making myself sick, WTH!! Then on top of the tummy issues, I have RA and Fibro pain so I mow and rest, garden and rest.

So while I am working on improving my gut health and tending to my gardens and yard, I’ll be writing about those things. And crafting. And furniture refinishing. I’ll get back to my recipes as soon as I can!

Drying Herbs-Parsley, Basil and Thyme

My herbs are growing like crazy this year!! And I really don’t want to waste them so… since I had success with drying mint leaves I thought I would try to dry some herbs, Parsley, Basil and Thyme.

There is nothing like fresh herbs to add to you recipes but over the winter it’s kinda hard to keep fresh herbs on hand and those little packets of herbs you get at the store are not always in the best condition and they can be a little pricey too.

And even though I have a decent green thumb, I have never had success with herbs indoors. But now that I think of it, I have not tried since I moved in my house. Maybe I’ll give it a try this winter.

So, let’s get started. You will need paper plates and paper towels. I also used parchment paper to put the dried herbs on before I crumbled them but you could use another paper plate.

You will also need airtight containers to store them in, you can buy cute little jars to do this or just save jars from jelly or condiments. Label each jar with the name of the herb and the year. The dried herbs should be good for a year.

After selecting the herb you want to dry first, make good cuttings and make sure you rinse off any dirt and bugs. I like to set the herbs in a glass jar with a little water to keep them fresh, then when the leaves are completely dry you can begin the drying process. You do NOT want to dry the herbs while they are still wet, the heat from the microwave will cook them instead of drying.

Parsley: This was a little bit of a challenge until I got it figured out! First I tried the oven knowing it would get brown, but I gave it a shot, but it stank! Smelled burnt instead of dried. Then I tried the microwave and they actually caught fire and threw sparks… What the HECK!!!

The first time I tried drying them in the microwave, I just put them on a glass plate like I did my mint. I was surprised when they actually sparked! Then I tried putting a shot glass with just a little water in it, back in the corner of the microwave. All that did was add more moisture which I figured it would but after seeing the sparks fly, I thought it was at least worth a shot! Lastly I used paper plates and covered the parsley with paper towels. And that worked like a charm!


Just lay out the parsley on a paper plate, a single layer, cover with paper towels and then nuke them in 30 second increments until they are completely dry and easily crumble when you touch them. Check the parsley after each 30 second increment. Depending on the parsley, the time to dry will vary. I had some stems that had large thick leaves and then I had some stems that had smaller, thinner leaves which did not take as long.

I also left the dried parsley sit on parchment paper for several hours before I crumbled them. You don’t have to do that but I just wanted to make sure they were completely dry.

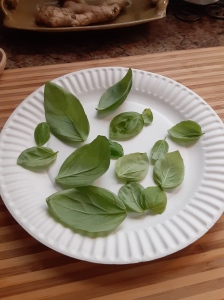
Basil: Again, lay the leaves on a paper plate in a single layer and not overlapping, and cover with paper towels. Nuke them in 20 or 30 second increments. My basil leave actually left off steam as they dried. I may have slightly panicked at first but then I put a paper towel over them and the drying process went well.

Nuke them in increments until they are dry. I left the leaves sit for a few hours before crumbling. I did run across one or two that were not completely dry so I popped them back in for a few seconds until they were crumbly.

Thyme: I just love this herb, it has to be one of my favorites. I put it in just about everything; scrambled eggs, quiche, soups, roasts, pasta salads, LOVE it!

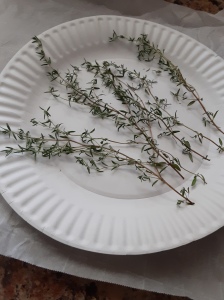
I did the same with the thyme, laying sprigs of thyme on a paper plate and cover with a paper towel. The thyme definitely dried quicker and that is because the leaves are much smaller and there is less moisture in the herb.

So I only needed 2 increments of 30 seconds and it was done. After a few minutes I just ran my fingers down the stem and the dried leaves just fell off! Then I folded the paper plate in half and used it as a funnel to slide the herbs into the glass jar.

This was a fun project that I did on a Sunday that was just too darn hot to be outside. I’m sure I will have more herbs later as the plants fill in again. And I plan on giving some dried herbs as gifts too. Better start saving more jars!

Drying Mint

I love growing mint, I use it for hot and iced tea as well as mojitos. I grow it in pots because of how invasive it is, and honestly, not only do I not have any other area’s in my gardens to grow it but I don’t want it growing all over the place!!

This year however, the mint didn’t come back as full and strong as it usually does. So I don’t have as much and it’s already looking a little sad. My last trip to the greenhouse I looked for mint but it was gone so I cannot plant more.

So, I am treating myself to one mojito every evening before dinner. And I am starting to dry some of it to use over the winter. I won’t have enough to last all winter but a little is better than none!

My recipe for iced mint tea and mojitos is here.

Last year I dried it in the oven but it turns a little brown, still good but brown. This year I tried it in the microwave and it turned out great! It’s still nice and green too.

I have 2 types of mint, don’t ask me what cuz I don’t know. If I had to guess and try to remember what I bought, I would say one is a type of spearmint and the fuzzy leaf is maybe an apple mint.

I put the clean and dry leaves on a microwavable plate, and nuked the leaves in about 20 seconds increments until they were dry. After each 20 seconds I checked on them to see how dry they were, then left them cool.

Next I placed all the leaves in a large bowl and crumbled them, and then put them in a pretty jar.


My next batch of drying the mint, I used paper plates and covered them with a paper towel and that was such a better way to dry them!

Hope you are all having a great summer!

Houseplants, Flowers and Butterfly’s

I have a deep imbedded love for houseplants and flowers. I think it started when I was quite young, maybe around 10, while I was visiting my aunt in Baltimore. She is also a houseplant and flower addict.


Anyway, she took me along to run her errands, one of those stops was a plant shop. She bought me a plant, and the addiction began.

I’ve had plants in my home ever since, even as a teenager I had plants in my room. To this day my aunt and I share plant and flower stories and cuttings.


I like to think I have a green thumb BUT there have been a few plants that I just cannot seem to keep alive. That doesn’t stop or discourage me although I do not like being the cause for a plants demise.


Same thing with my outside flowers and plants; I cannot get enough flowers for the summer! I have pots of annual flowers all over the front porch, back patio and even in the mulch beds. And my mulch beds are filled with perennials. I am always finding something new to me that sparks in my heart!


I still have a lot of empty spots in my flower beds that need filled in, so I am working on a list. Last year I bought some varieties of cone flowers, unfortunately the bunnies ate a lot of them and they never really grew after that. This year they are coming up nicely so I’m excited to see them bloom.


This is my third spring with my little lilac bush, my most favorite flower ever. Limelight hydrangea’s are also a favorite, I have 6 of those.


I like to hide little things in my flowers too. I have some trolls, one of which is doing yoga! And I have a small fairy garden set up for the granddaughters. I even have a frog doing yoga in one of the flower beds.


I also love butterfly bushes, the Black Knight is my favorite. And with all of these flowers, especially the butterfly bushes that I have, brings a lot of butterflies.

So now I “raise” them. I keep pots of parsley in all the beds, Black Swallowtails lay their eggs on parsley. And I have Butterfly Weed, Monarchs lay their eggs on that.

At the end of last summer I had 10 Black Swallowtail chrysalis’ that overwintered. All of them have eclosed this spring.

I had hoped to raise bees this year but there is a little bit of expense to start the set up. My home needs some attention and that is where I need to put that money this year, so maybe next year I can start beekeeping.

I suppose at some point I will no longer have room to buy anymore plants, I am getting really close but I’m not there yet!

I need more flowers!

For anyone that knows me and knows me well, knows that I love plants! Not only house plants, but I am equally in love with annuals and perennials. There are a ton of flowers I want for my yard and just do not have the place to put them. Whether it be due to the sun they need to the space they require for full growth.

I have been in my house for 5 years now, there were absolutely NO flower beds on the property when I moved in.

This flower bed was the last one that I added at the end of the summer last year. I desperately wanted bearded iris and roses but I didn’t have a good place so….

When I found these 3 iris plants reduced to half price at the end of the summer, I bought them and went to work to put in a new bed. Now I am looking for a raspberry colored rose bush as well as a beige colored rose. Then I will fill in the rest of the bed with perennials and pots of annuals.

Seriously, I go nuts with flowers over the summer. I am still filling in the other beds with perennials. Last year I found a gorgeous orange cone flower and some pretty asters.

Last year I also struggled with all the bunnies in my neighborhood eating my coneflowers! Thus the large concrete bricks you see along the fence. My yard is incredibly uneven so when the fence was installed, I ended up with gaps where rabbits, squirrels, and my dog, could get in and out.

Like a lot of you, we are having an early spring so my plants are coming along quite well BUT we still have some occasional chilly days and nights. I am so anxious to get out and play in the dirt and not have to worry about the temps.

Anyway, this particular bed is looking a little sad and lost right now and as soon as I can flower shop I will be filling it up for gorgeous blooms that warm my heart and make me happy to be home.

Be well my friends!